Remove IndexSearch Hijacker From Mac
IndexSearch: Manual Guide To Delete
IndexSearch is a potentially unwanted application that has both adware and browser hijacker capabilities. It is designed to intrude Mac computers without detection, and modifies several browser settings like the homepage, new tab address, and implements a fake search engine. The PUA also generates commercial material like pop-ups, banners, surveys, and inserts dangerous links that can lead to even more severe infections by performing devious scripts upon clicking on them. After the browser settings get changed, users notice that something unusual is occurring and they start getting rerouted to ad-supported pages.
IndexSearch Manipulates Search Results:
IndexSearch usually alters the search provider to other engine and redirects search results to Yahoo, although this might differ from version to version. The main goal of adware is to show users advertisements and that’s why the browser settings are changed straight away. While using the manipulated search tool, you usually get inorganic results that are full of affiliated links and ads. The third-party content cannot be safe. The creators of this app insert promotional link to search results so that they could make some money. With each click on the sponsored content, money falls straight to their pockets via pay-per-click method.
IndexSearch ads may look eye-catching at the first glance but can be very dangerous for your PC’s as well as your safety. They may reroute you to potentially insecure pages which contain malware, porn, tech support scams, fake software updates, and other spiteful material. Upon landing on such dubious portals, you may end up downloading malicious software or even malware, exposing your personal data to cyber criminals and so on. Moreover, while having such browser-based intruder inside your device, there is data tracking going on as well.
IndexSearch is having cookies and other tracking methods that allows its developers to gather users’ geolocations, URLs visited, IP addresses, search inquiries, links clicked, etc. which can lead to privacy issues. Personalized advertising campaigns and identity theft can be the consequence of adware infection. Commercial content creators may utilize your browsing preferences to customize ads tailored to your interests. Moreover, if scammers could access your personal data like credit card details, they can misuse it for making fraudulent transactions, unauthorized purchases, or for other illusive motives. Thus, this notorious PUP may lead to significant financial losses. So, you must perform a quick IndexSearch removal from the Mac.
PUPs Are Spread Through Freeware Installations:
Adware and other potentially unwanted programs are mostly distributed using the “bundling” technique in which regular software pre-packed with several components. When users download a freeware from third-party websites and then perform rushed installation practice, e.g., ignoring terms, skipping steps and sections, choosing Quick or Default settings, etc., they find that various PUPs have been installed alongside.
We recommend using only official app stores for downloading software, and stay away from unofficial and freeware sites, peer-to-peer networks, and other third-party downloaders. Moreover, you should always select the “Custom” or “Advanced” installation method and go through all the steps. Read the Terms of Use and Privacy Policy, and check the program list, make sure to untick the boxes next to unnecessary apps. This way, you can avoid PUPs from entering your computer. If your Mac is already contaminated with this unwanted program, you must remove IndexSearch from the device without wasting any time.
Special Offer (For Macintosh)
IndexSearch can be creepy computer infection that may regain its presence again and again as it keeps its files hidden on computers. To accomplish a hassle free removal of this malware, we suggest you take a try with a powerful antimalware scanner to help you getting rid of this virus
Remove Files and Folders Related to IndexSearch
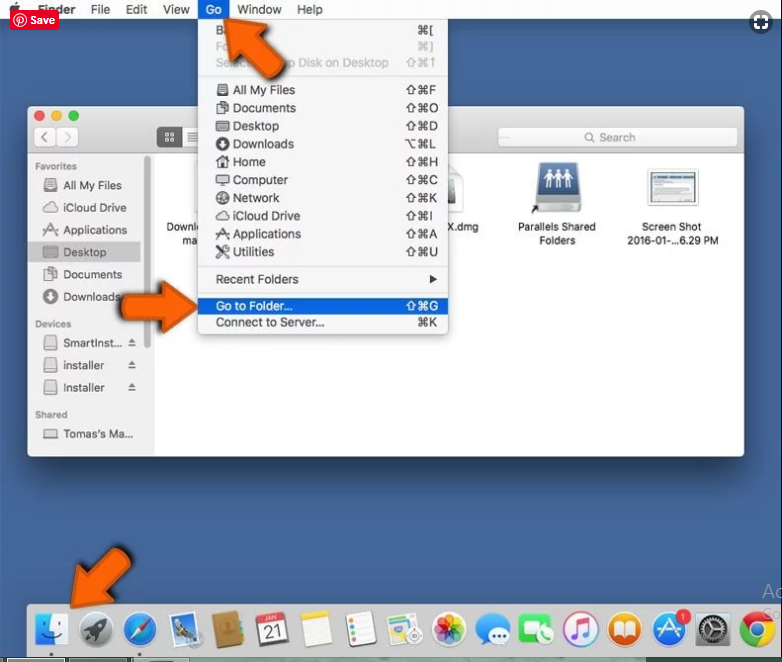
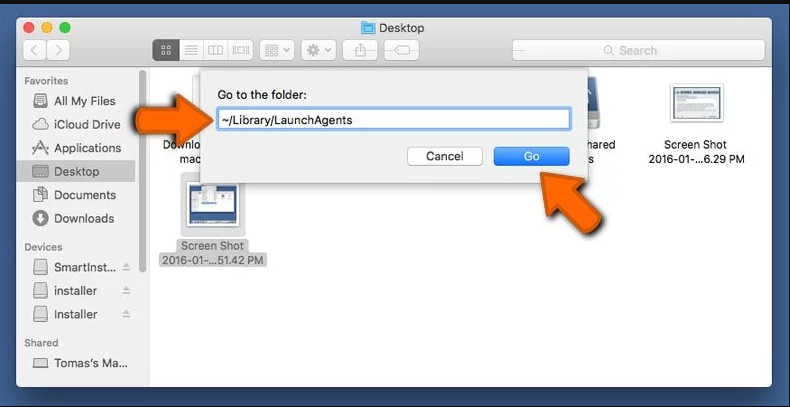
Open the “Menu” bar and click the “Finder” icon. Select “Go” and click on “Go to Folder…”
Step 1: Search the suspicious and doubtful malware generated files in /Library/LaunchAgents folder
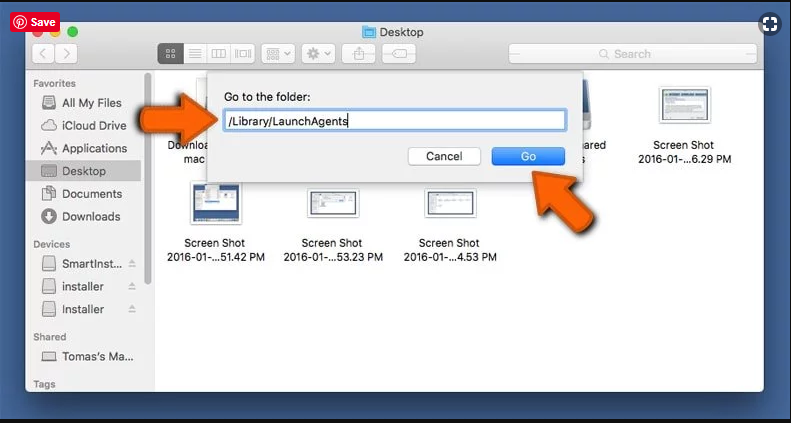
Type /Library/LaunchAgents in the “Go to Folder” option
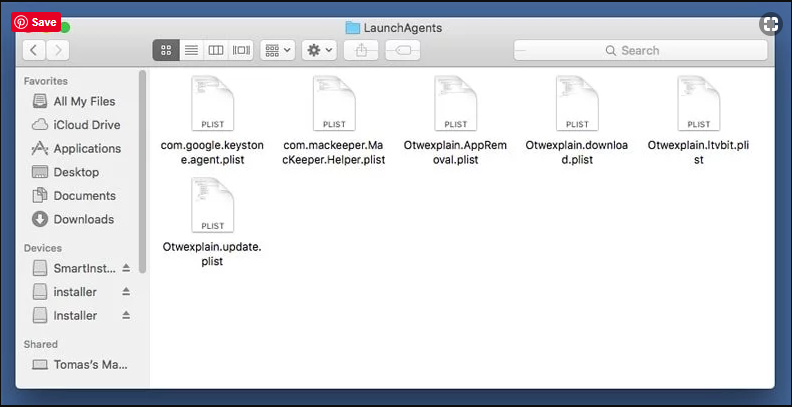
In the “Launch Agent” folder, search for all the files that you have recently downloaded and move them to “Trash”. Few of the examples of files created by browser-hijacker or adware are as follow, “myppes.download.plist”, “mykotlerino.Itvbit.plist”, installmac.AppRemoval.plist”, and “kuklorest.update.plist” and so on.
Step 2: Detect and remove the files generated by the adware in “/Library/Application” Support folder
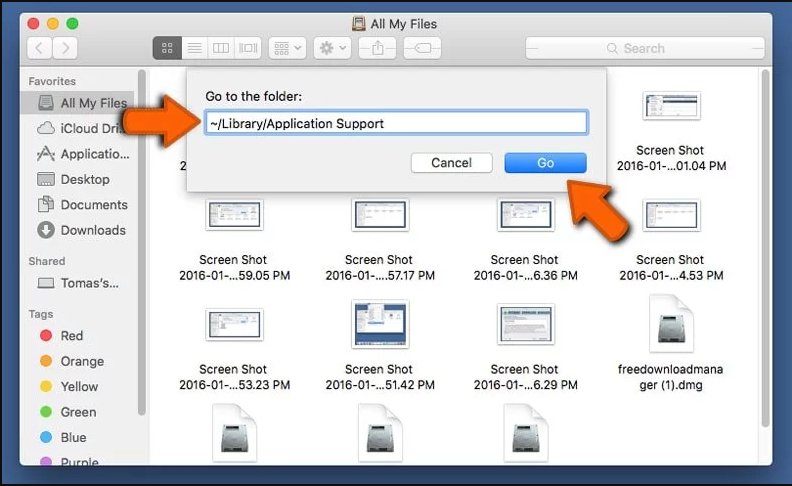
In the “Go to Folder..bar”, type “/Library/Application Support”
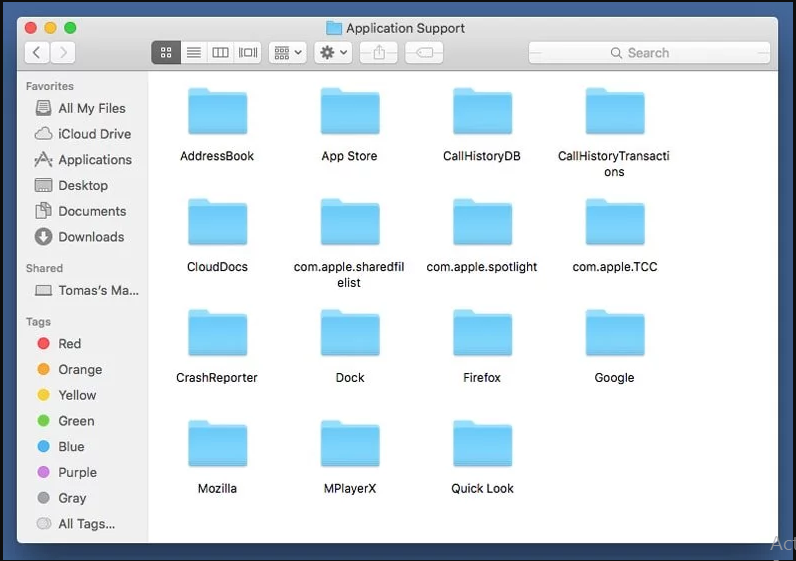
Search for any suspicious newly added folders in “Application Support” folder. If you detect any one of these like “NicePlayer” or “MPlayerX” then send them to “Trash” folder.
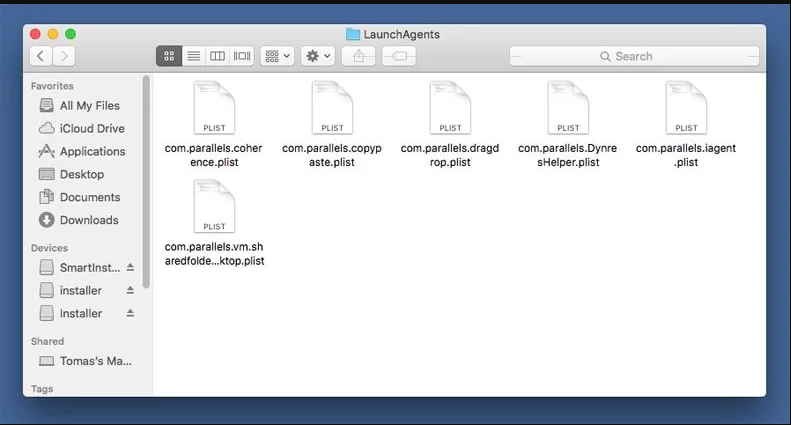
Step 3: Look for the files generated by malware in /Library/LaunchAgent Folder:
Go to Folder bar and type /Library/LaunchAgents
You are in the “LaunchAgents” folder. Here, you have to search for all the newly added files and move them to “Trash” if you find them suspicious. Some of the examples of suspicious files generated by malware are “myppes.download.plist”, “installmac.AppRemoved.plist”, “kuklorest.update.plist”, “mykotlerino.ltvbit.plist” and so on.
Step4: Go to /Library/LaunchDaemons Folder and search for the files created by malware
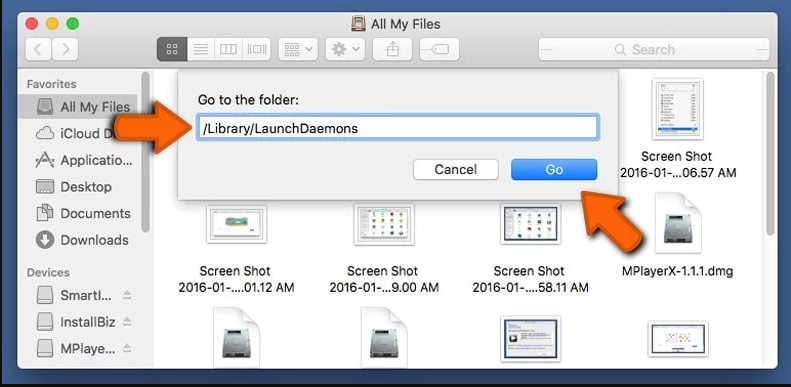
Type /Library/LaunchDaemons in the “Go To Folder” option
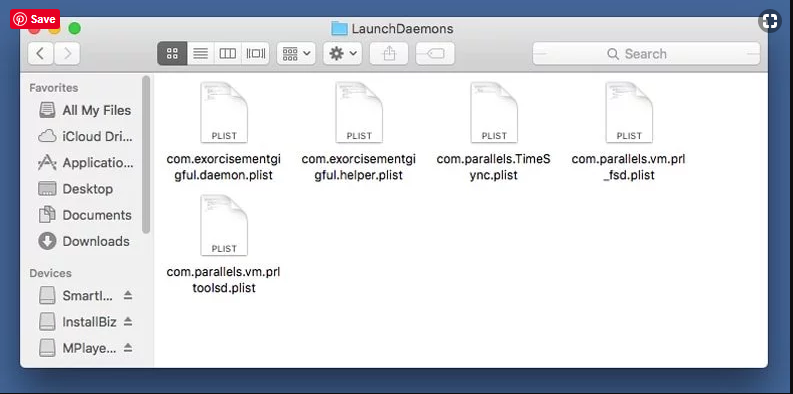
In the newly opened “LaunchDaemons” folder, search for any recently added suspicious files and move them to “Trash”. Examples of some of the suspicious files are “com.kuklorest.net-preferences.plist”, “com.avickUpd.plist”, “com.myppes.net-preference.plist”, “com.aoudad.net-preferences.plist” and so on.
Step 5: Use Combo Cleaner Anti-Malware and Scan your Mac PC
The malware infections could be removed from the Mac PC if you execute all the steps mentioned above in the correct way. However, it is always advised to be sure that your PC is not infected. It is suggested to scan the work-station with “Combo Cleaner Anti-virus”.
Special Offer (For Macintosh)
IndexSearch can be creepy computer infection that may regain its presence again and again as it keeps its files hidden on computers. To accomplish a hassle free removal of this malware, we suggest you take a try with a powerful antimalware scanner to help you getting rid of this virus
Once the file gets downloaded, double click on combocleaner.dmg installer in the newly opened window. Next is to open the “Launchpad” and press on “Combo Cleaner” icon. It is advised to wait until “Combo Cleaner” updates the latest definition for malware detection. Click on “Start Combo Scan” button.
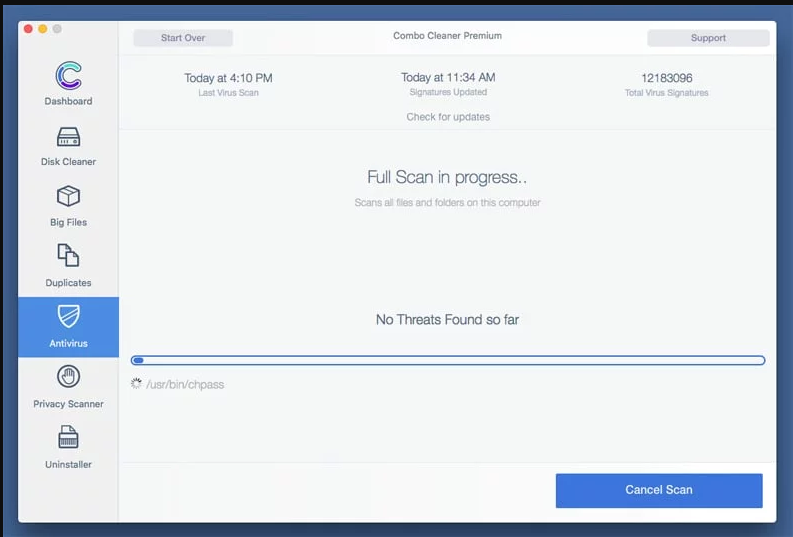
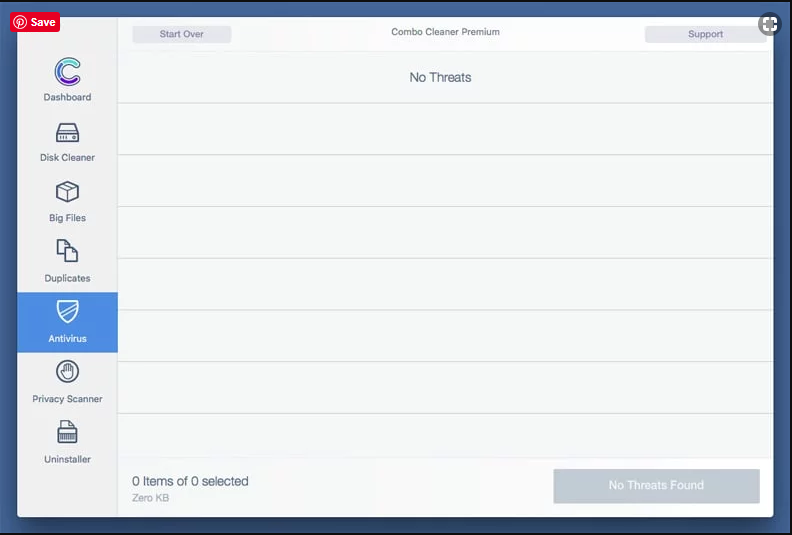
A depth scan of your Mac PC will be executed in order to detect malware. If the Anti-virus scan report says “no threat found” then you can continue with guide further. On the other hand, it is recommended to delete the detected malware infection before continuing.
Now the files and folders created by the adware is removed, you have to remove the rogue extensions from the browsers.
Remove IndexSearch from Internet Browsers
Delete Doubtful and Malicious Extension from Safari
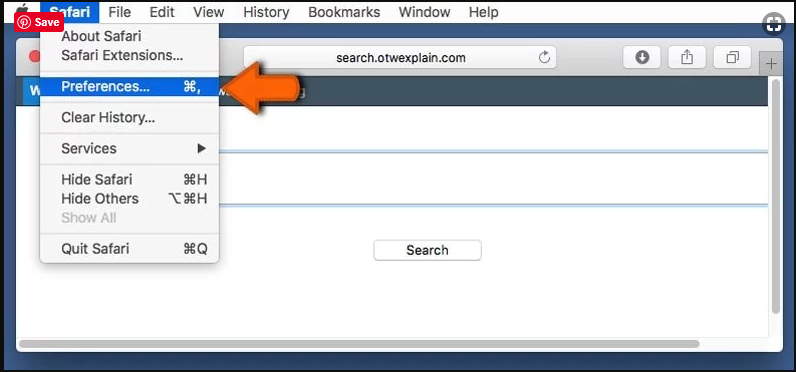
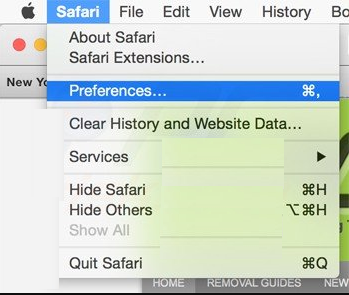
Go to “Menu Bar” and open “Safari” browser. Select “Safari” and then “Preferences”
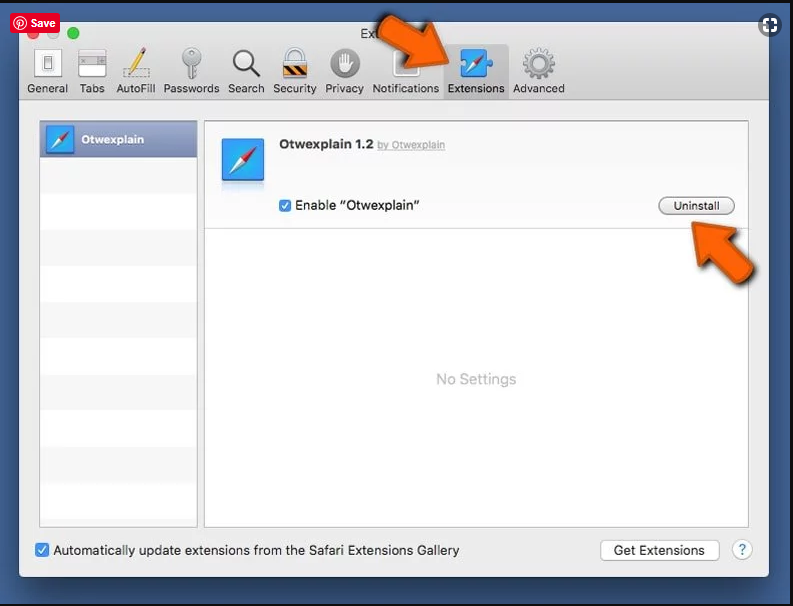
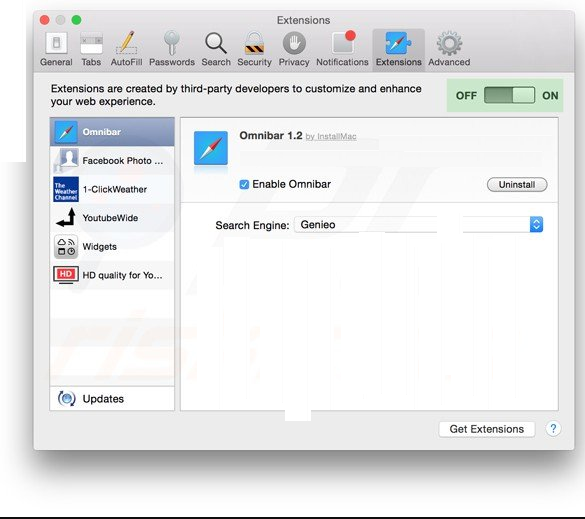
In the opened “preferences” window, select “Extensions” that you have recently installed. All such extensions should be detected and click the “Uninstall” button next to it. If you are doubtful then you can remove all the extensions from “Safari” browser as none of them are important for smooth functionality of the browser.
In case if you continue facing unwanted webpage redirections or aggressive advertisements bombarding, you can reset the “Safari” browser.
“Reset Safari”
Open the Safari menu and choose “preferences…” from the drop-down menu.
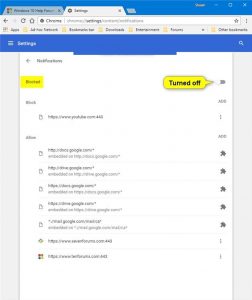
Go to the “Extension” tab and set the extension slider to “Off” position. This disables all the installed extensions in the Safari browser
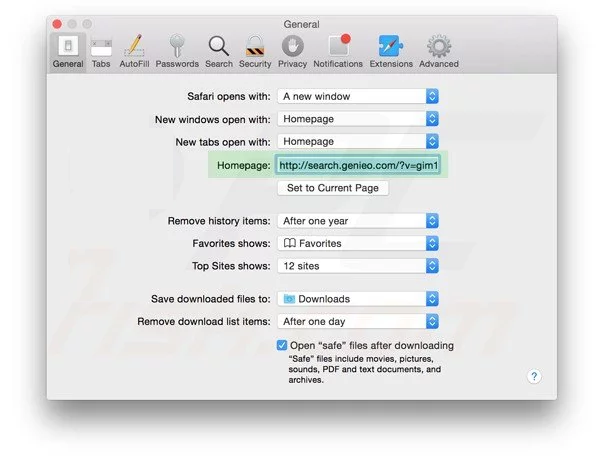
Next step is to check the homepage. Go to “Preferences…” option and choose “General” tab. Change the homepage to your preferred URL.
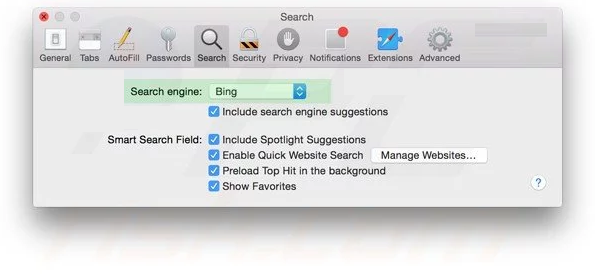
Also check the default search-engine provider settings. Go to “Preferences…” window and select the “Search” tab and select the search-engine provider that you want such as “Google”.
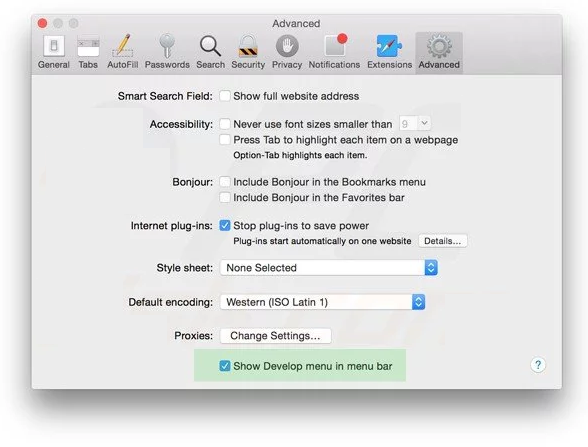
Next is to clear the Safari browser Cache- Go to “Preferences…” window and select “Advanced” tab and click on “Show develop menu in the menu bar.“
Go to “Develop” menu and select “Empty Caches”.

Remove website data and browsing history. Go to “Safari” menu and select “Clear History and Website Data”. Choose “all history” and then click on “Clear History”.

Remove Unwanted and Malicious Plug-ins from Mozilla Firefox
Delete IndexSearch add-ons from Mozilla Firefox
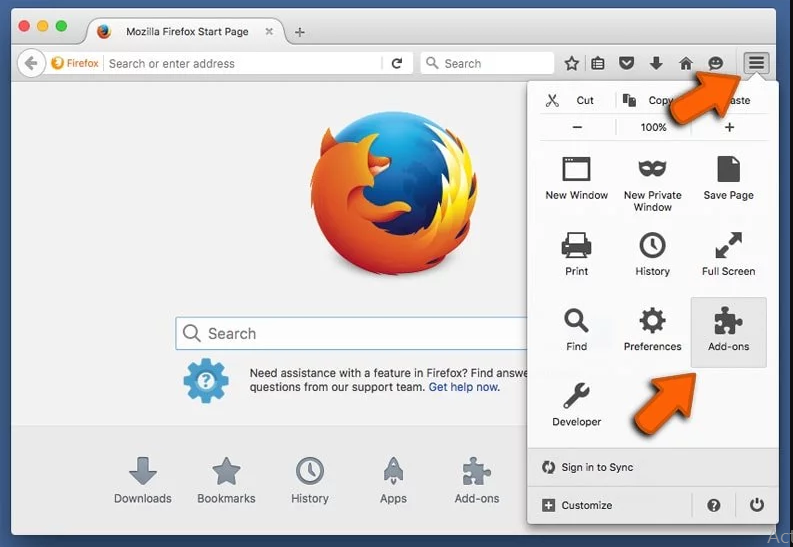
Open the Firefox Mozilla browser. Click on the “Open Menu” present in the top right corner of the screen. From the newly opened menu, choose “Add-ons”.
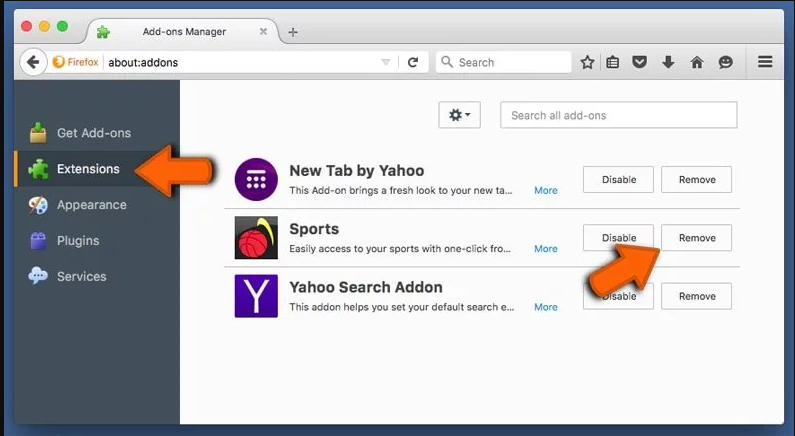
Go to “Extension” option and detect all the latest installed add-ons. Select each of the suspicious add-ons and click on “Remove” button next to them.
In case if you want to “reset” the Mozilla Firefox browser then follow the steps that has been mentioned below.
Reset Mozilla Firefox Settings
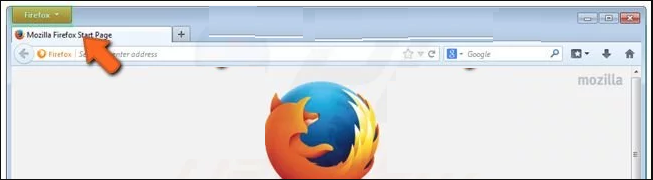
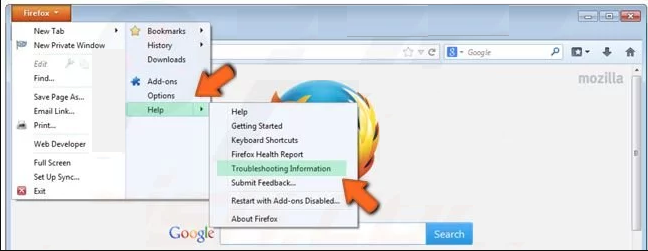
Open the Firefox Mozilla browser and click on “Firefox” button situated at the top left corner of the screen.
In the new menu, go to “Help” sub-menu and choose “Troubleshooting Information”
In the “Troubleshooting Information” page, click on “Reset Firefox” button.
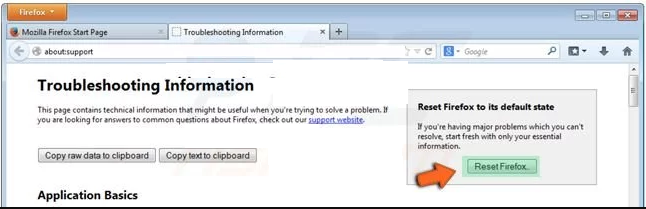
Confirm that you want to reset the Mozilla Firefox settings to default by pressing on “Reset Firefox” option

The browser will get restarted and the settings changes to factory default
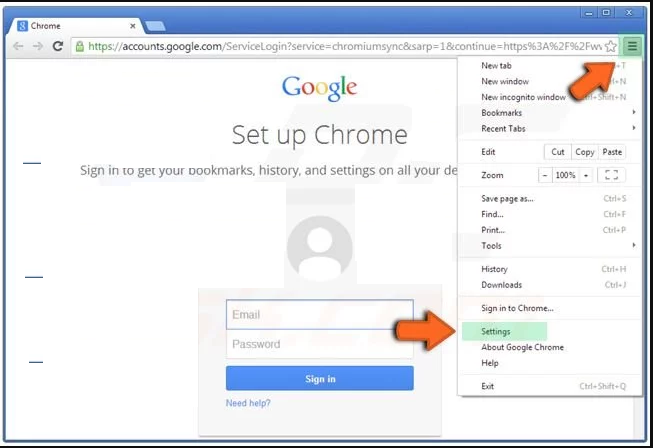
Delete Unwanted and Malicious Extensions from Google Chrome
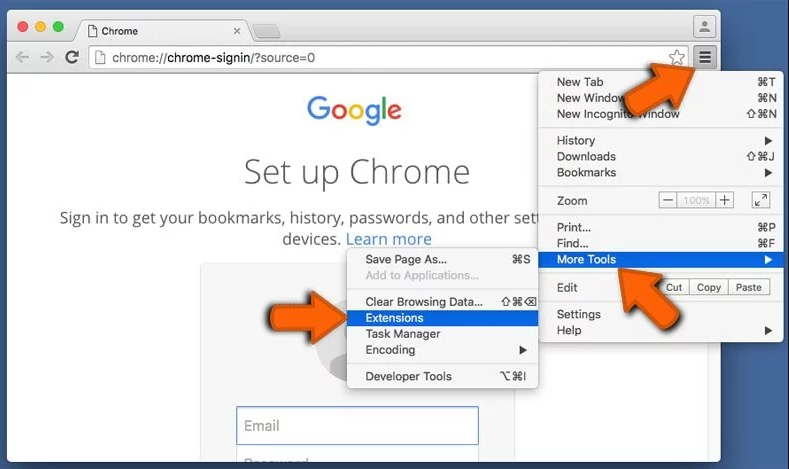
Open the chrome browser and click on “Chrome menu”. From the drop down option, choose “More Tools” and then “Extensions”.
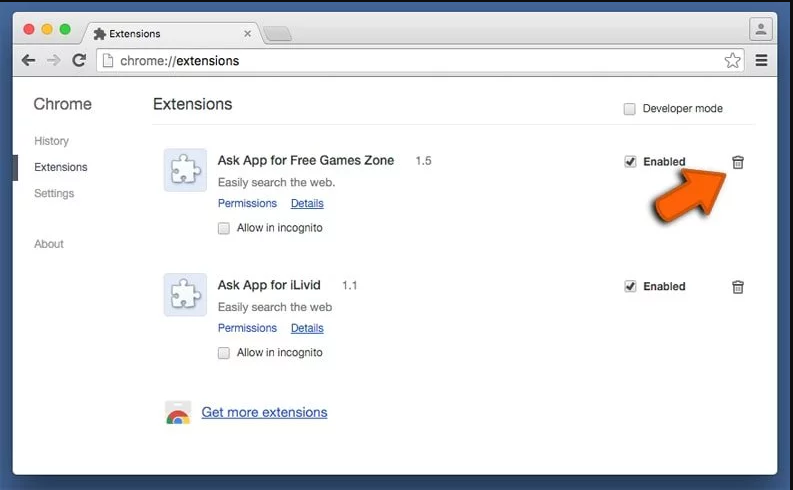
In the “Extensions” option, search for all the recently installed add-ons and extensions. Select them and choose “Trash” button. Any third-party extension is not important for the smooth functionality of the browser.
Reset Google Chrome Settings
Open the browser and click on three line bar at the top right side corner of the window.
Go to the bottom of the newly opened window and select “Show advanced settings”.

In the newly opened window, scroll down to the bottom and choose “Reset browser settings”
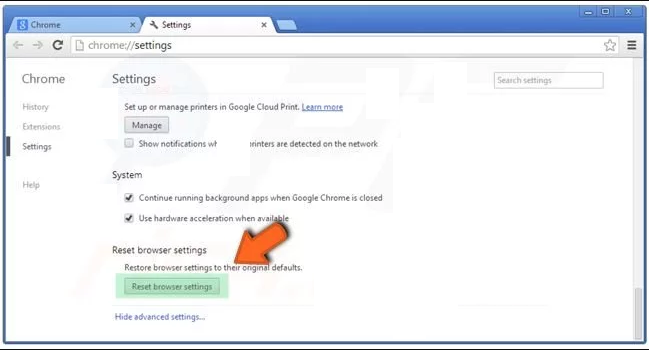
Click on the “Reset” button on the opened “Reset browser settings” window

Restart the browser and the changes you get will be applied
The above mentioned manual process should be executed as it is mentioned. It is a cumbersome process and requires a lot of technical expertise. And hence it is advised for technical experts only. To be sure that your PC is free from malware, it is better that you scan the work-station with a powerful anti-malware tool. The automatic malware removal application is preferred because it doesn’t requires any additional technical skills and expertise.
Special Offer (For Macintosh)
IndexSearch can be creepy computer infection that may regain its presence again and again as it keeps its files hidden on computers. To accomplish a hassle free removal of this malware, we suggest you take a try with a powerful antimalware scanner to help you getting rid of this virus
Download the application and execute it on the PC to begin the depth scanning. Once the scanning gets completed, it shows the list of all the files related to IndexSearch. You can select such harmful files and folders and remove them immediately.