How To Remove PuAgent
Learn Guidelines To Delete PuAgent
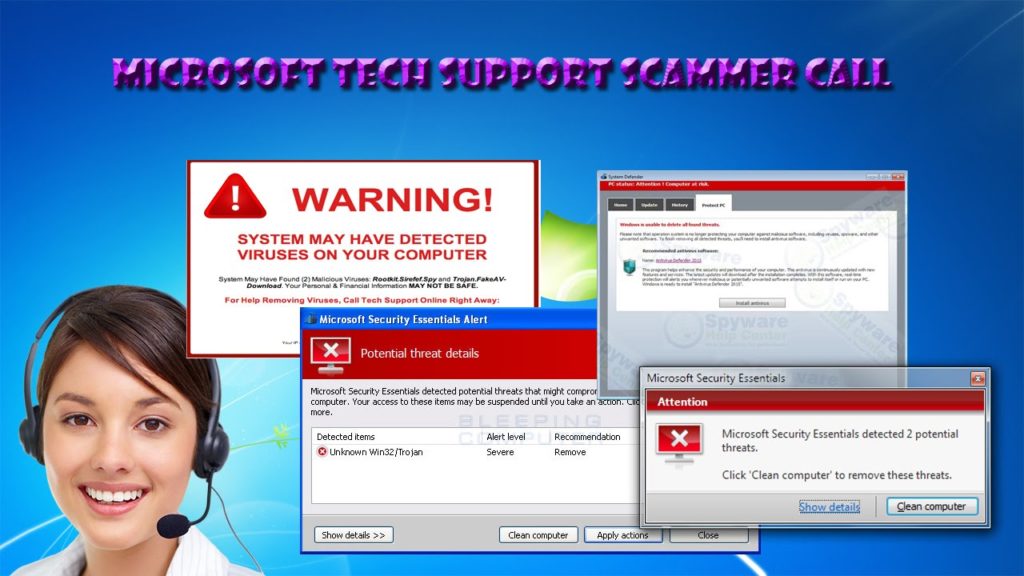
PuAgent is found to be a new adware infection which is recently discovered and said to be a risky object, especially for a Mac OS based computers. This kind of adware secretly assails on targeted computers to alter some critical values and makes the PC access terrible in no time. While having a system infected by PuAgent, the victims are expected to face off just issues or problems like hijacked web browser settings, eruption of commercial pop ups on screen, redirects to unwanted or phishing online sources, and many more. In order to learn more about its impacts and how to delete PuAgent from computers, we suggest you to keep reading this article.
Threat At A Glance
Name: PuAgent
Type: Adware, browser hijacker
Symptoms: Modified homepage, new tab and search engine defaults, eruption of commercial pop ups, and so on.
Description: PuAgent is termed to be an adware or browser hijacker that may put your system and its data to be on high risk of being accessed by hackers, along with more other high potential issues.
Distribution: Spam/junk email attachments, freeware or shareware installer packages, malicious links or ads, and many more.
Removal: To learn detailed information to detect and delete PuAgent from compromised computer, get through the instructions discussed under this article.
What is PuAgent
PuAgent is technically said to be a vicious adware or browser hijacker which claims to allow Mac users to access their system fast and efficiently. Looking through its features or functions in initial, it easily can manage to tame users through its functions, but as soon as the app is installed, leads the users to face just troubles throughout the online sessions. Even, the experts have to say the app is mostly distributed through PUPs or unsafe software which are abundantly available over web, in addition, the apps get installed on computer without any prior notice, so it’s no wrong to call PuAgent as as a PUP.
Adware like PuAgent may seem not much harmful in initial when get installed on computers. But as soon as the app is installed, it starts to manipulate with browsers and its internal settings without seeking any administrative permissions. In such cases, all active browsers like Chrome, Firefox, Opera, Safari, Etc, are modified and their settings like homepage, new tab, and search engine defaults are altered to show a ransom website. Therefore, every time the online sessions are started to surf web efficiently, the modified browser values leads users to get redirected to unsafe websites, or eruption of pop ups or banners start to strike on screen.
In addition to unwanted modifications or changes to browser settings, PuAgent can be more drastic to computer users due to its data tracking capabilities. Means, the adware just not only impacts your online sessions by altering critical settings, but also keeps a look over all personal inputs, key preferences, browsing history, and many other details too. In such cases, the victims are expect to lose their values to cyber crime master minds and which can easily lead to high potential data or financial loss.
How PUPs or adware get installed on computers?
Mostly, the PUPs or adware is installed on computers through a number of deceptive marketing tricks or techniques in which software bundling, email spam marketing, and many other social engineering forms are being used widely. The third party applications, documents, receipts, like stuffs and shared over tbe web as a freebie and the victims are asked to download and install such stuffs on their machine. Once the installation is processed, the hidden malware code runs in background to show negative impacts.
If your Mac system is running out of order due to unintentional presence of PuAgent, then we highly suggest you to learn some effective measures through which the victims can easily detect and remove PuAgent along with all its associated elements completely from their machine. For more information, refer to guidelines section below.
Special Offer (For Macintosh)
PuAgent can be creepy computer infection that may regain its presence again and again as it keeps its files hidden on computers. To accomplish a hassle free removal of this malware, we suggest you take a try with a powerful antimalware scanner to help you getting rid of this virus
Remove Files and Folders Related to PuAgent
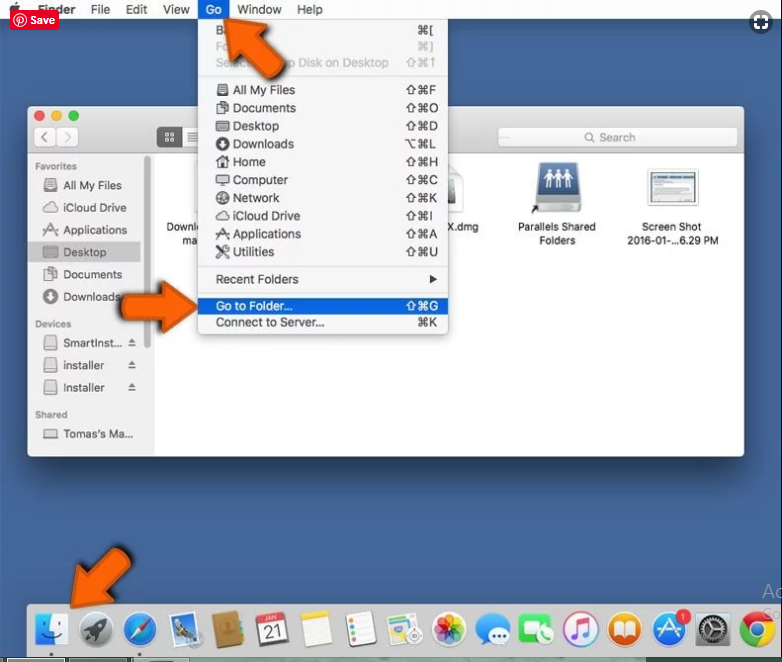
Open the “Menu” bar and click the “Finder” icon. Select “Go” and click on “Go to Folder…”
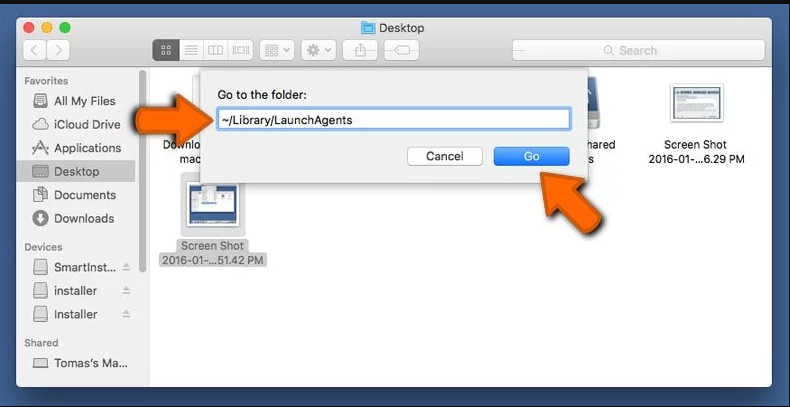
Step 1: Search the suspicious and doubtful malware generated files in /Library/LaunchAgents folder
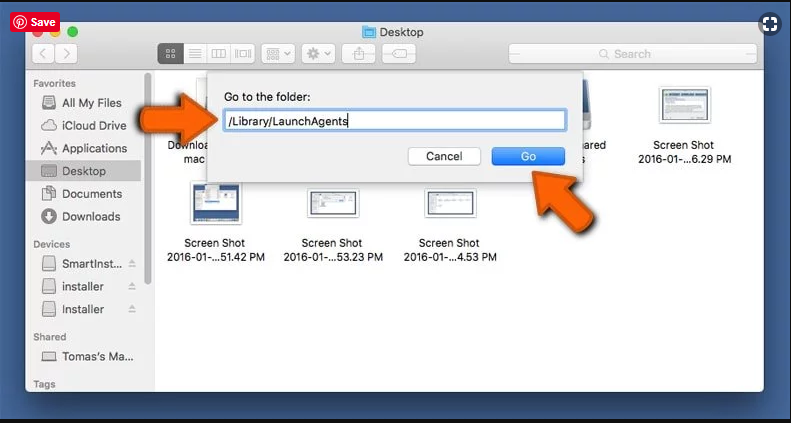
Type /Library/LaunchAgents in the “Go to Folder” option
In the “Launch Agent” folder, search for all the files that you have recently downloaded and move them to “Trash”. Few of the examples of files created by browser-hijacker or adware are as follow, “myppes.download.plist”, “mykotlerino.Itvbit.plist”, installmac.AppRemoval.plist”, and “kuklorest.update.plist” and so on.
Step 2: Detect and remove the files generated by the adware in “/Library/Application” Support folder
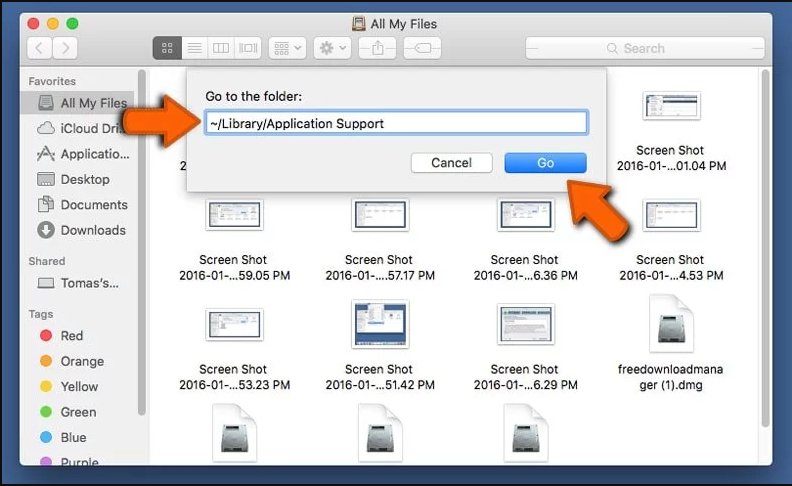
In the “Go to Folder..bar”, type “/Library/Application Support”
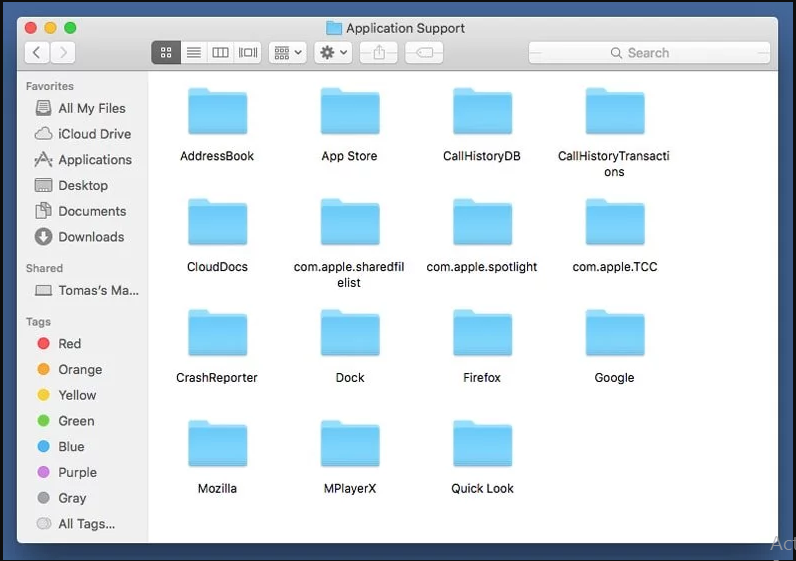
Search for any suspicious newly added folders in “Application Support” folder. If you detect any one of these like “NicePlayer” or “MPlayerX” then send them to “Trash” folder.
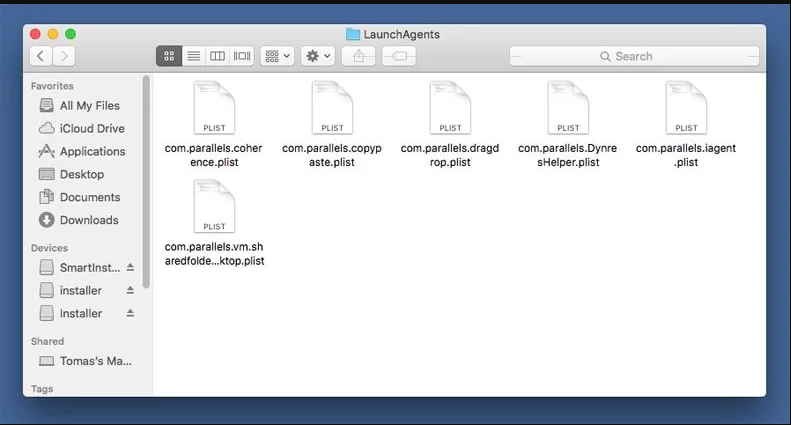
Step 3: Look for the files generated by malware in /Library/LaunchAgent Folder:
Go to Folder bar and type /Library/LaunchAgents
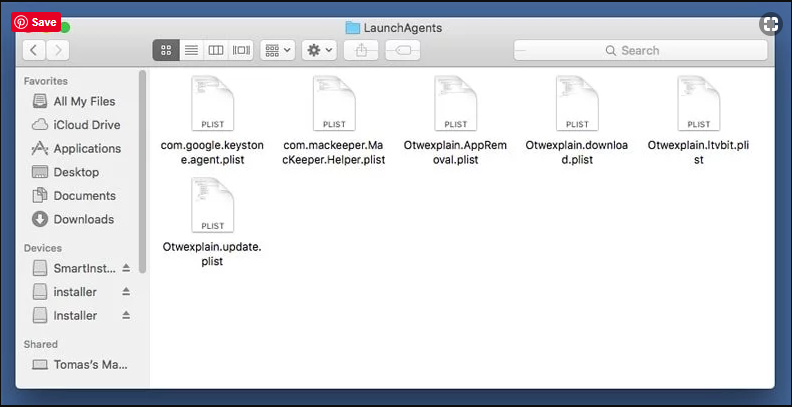
You are in the “LaunchAgents” folder. Here, you have to search for all the newly added files and move them to “Trash” if you find them suspicious. Some of the examples of suspicious files generated by malware are “myppes.download.plist”, “installmac.AppRemoved.plist”, “kuklorest.update.plist”, “mykotlerino.ltvbit.plist” and so on.
Step4: Go to /Library/LaunchDaemons Folder and search for the files created by malware
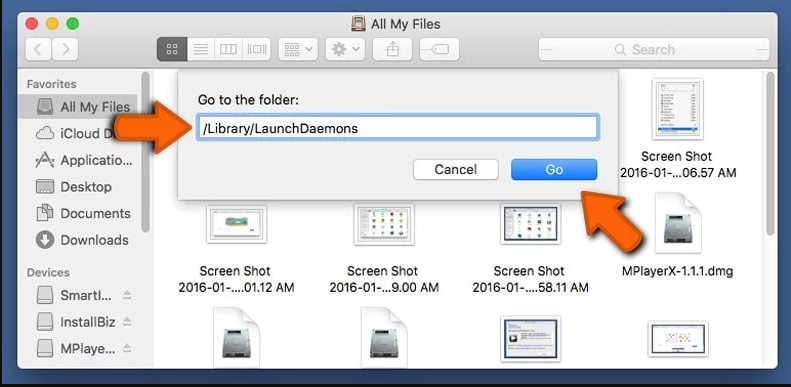
Type /Library/LaunchDaemons in the “Go To Folder” option
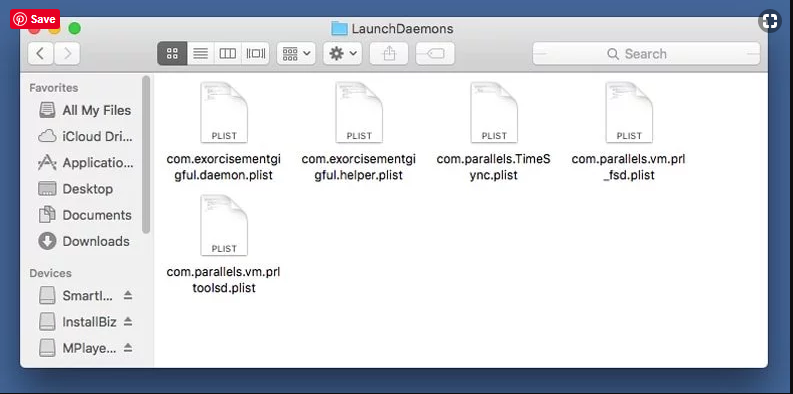
In the newly opened “LaunchDaemons” folder, search for any recently added suspicious files and move them to “Trash”. Examples of some of the suspicious files are “com.kuklorest.net-preferences.plist”, “com.avickUpd.plist”, “com.myppes.net-preference.plist”, “com.aoudad.net-preferences.plist” and so on.
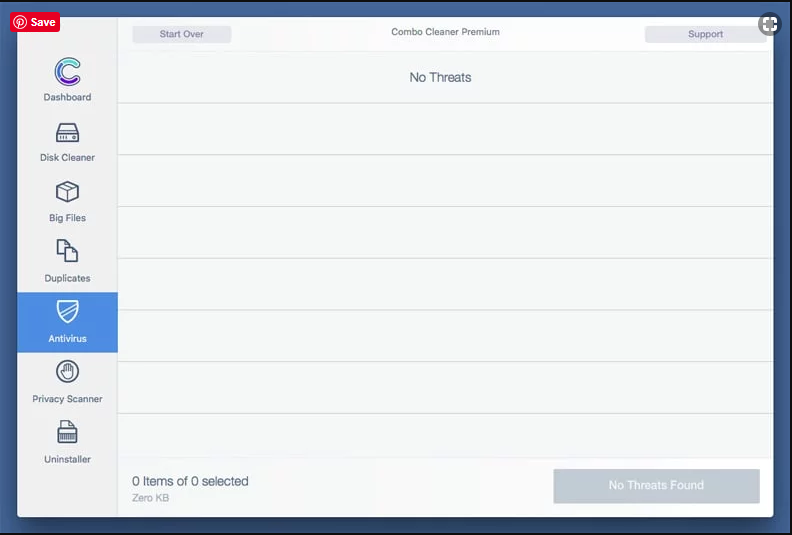
Step 5: Use Combo Cleaner Anti-Malware and Scan your Mac PC
The malware infections could be removed from the Mac PC if you execute all the steps mentioned above in the correct way. However, it is always advised to be sure that your PC is not infected. It is suggested to scan the work-station with “Combo Cleaner Anti-virus”.
Special Offer (For Macintosh)
PuAgent can be creepy computer infection that may regain its presence again and again as it keeps its files hidden on computers. To accomplish a hassle free removal of this malware, we suggest you take a try with a powerful antimalware scanner to help you getting rid of this virus
Once the file gets downloaded, double click on combocleaner.dmg installer in the newly opened window. Next is to open the “Launchpad” and press on “Combo Cleaner” icon. It is advised to wait until “Combo Cleaner” updates the latest definition for malware detection. Click on “Start Combo Scan” button.
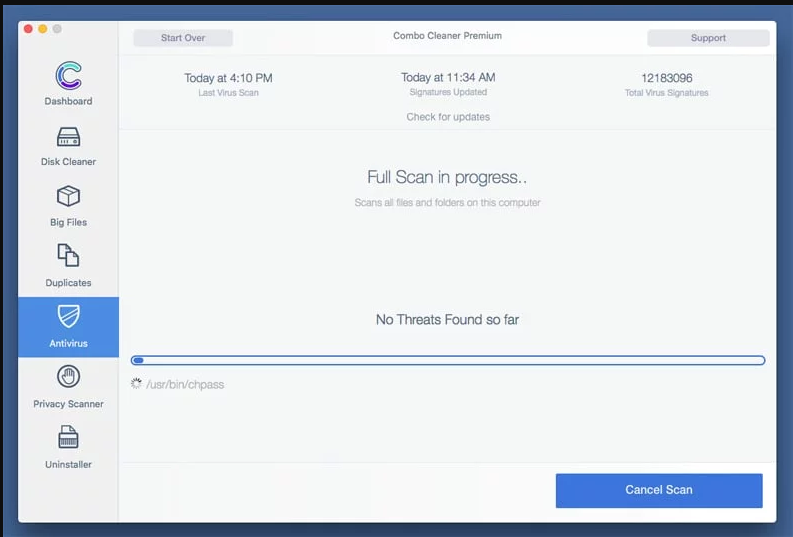
A depth scan of your Mac PC will be executed in order to detect malware. If the Anti-virus scan report says “no threat found” then you can continue with guide further. On the other hand, it is recommended to delete the detected malware infection before continuing.
Now the files and folders created by the adware is removed, you have to remove the rogue extensions from the browsers.
Remove PuAgent from Internet Browsers
Delete Doubtful and Malicious Extension from Safari
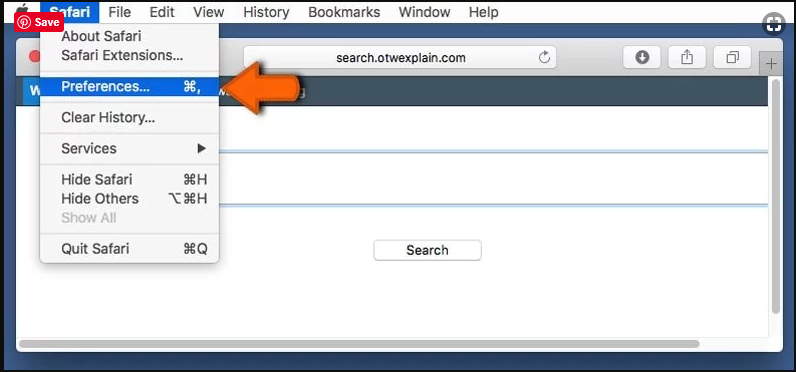
Go to “Menu Bar” and open “Safari” browser. Select “Safari” and then “Preferences”
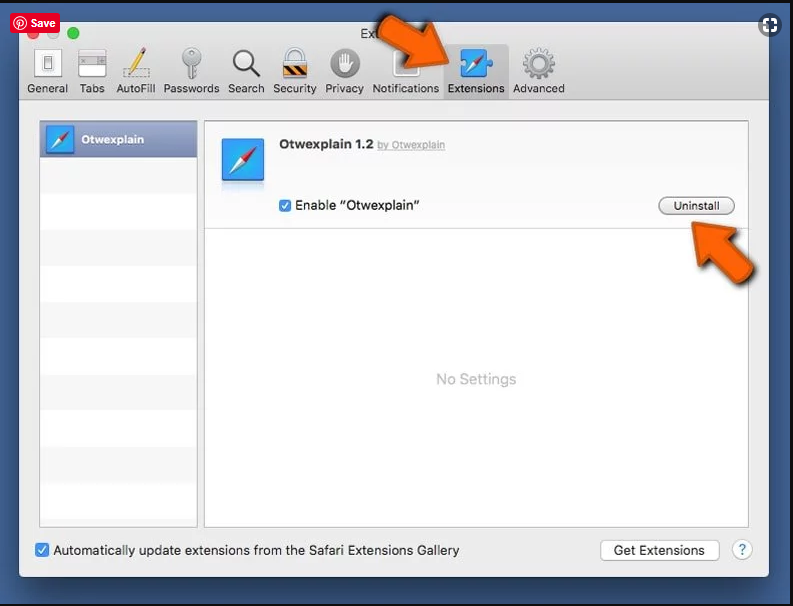
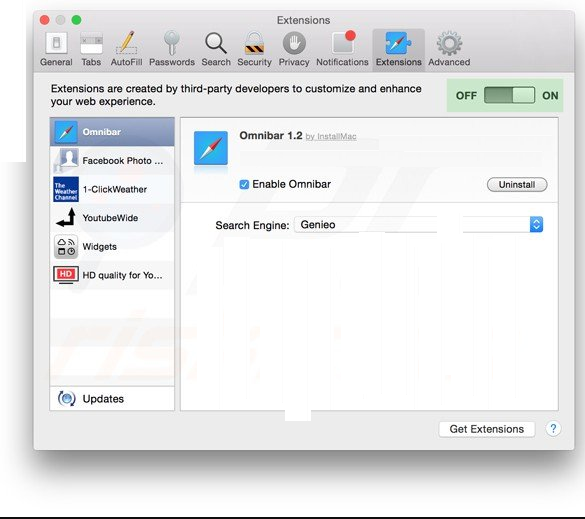
In the opened “preferences” window, select “Extensions” that you have recently installed. All such extensions should be detected and click the “Uninstall” button next to it. If you are doubtful then you can remove all the extensions from “Safari” browser as none of them are important for smooth functionality of the browser.
In case if you continue facing unwanted webpage redirections or aggressive advertisements bombarding, you can reset the “Safari” browser.
“Reset Safari”
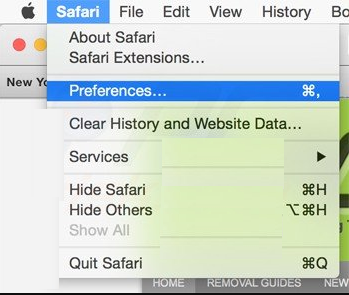
Open the Safari menu and choose “preferences…” from the drop-down menu.
Go to the “Extension” tab and set the extension slider to “Off” position. This disables all the installed extensions in the Safari browser
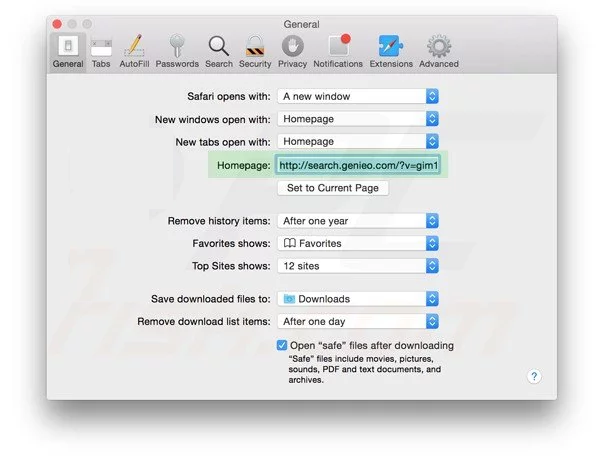
Next step is to check the homepage. Go to “Preferences…” option and choose “General” tab. Change the homepage to your preferred URL.
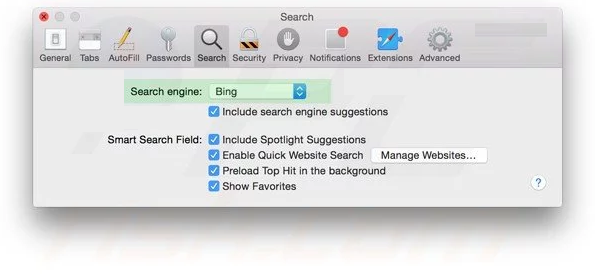
Also check the default search-engine provider settings. Go to “Preferences…” window and select the “Search” tab and select the search-engine provider that you want such as “Google”.
Next is to clear the Safari browser Cache- Go to “Preferences…” window and select “Advanced” tab and click on “Show develop menu in the menu bar.“
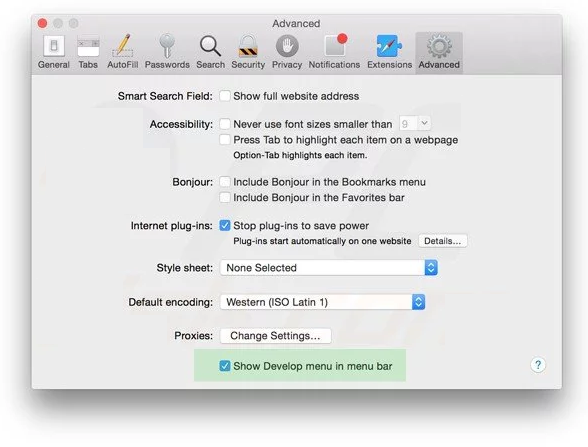
Go to “Develop” menu and select “Empty Caches”.

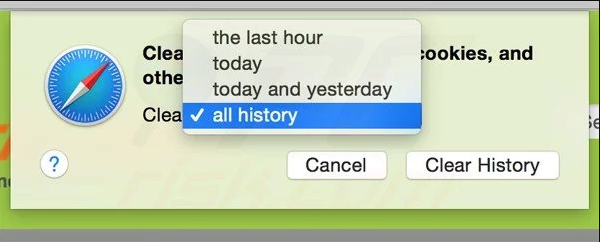
Remove website data and browsing history. Go to “Safari” menu and select “Clear History and Website Data”. Choose “all history” and then click on “Clear History”.
Remove Unwanted and Malicious Plug-ins from Mozilla Firefox
Delete PuAgent add-ons from Mozilla Firefox
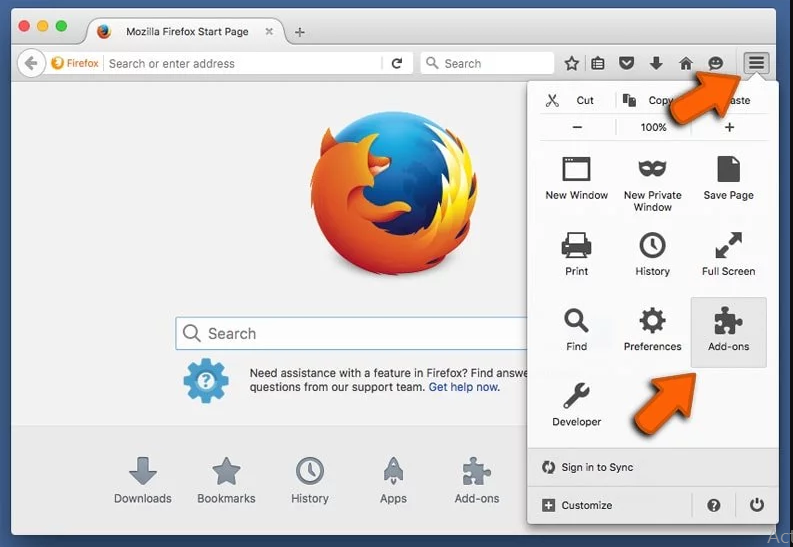
Open the Firefox Mozilla browser. Click on the “Open Menu” present in the top right corner of the screen. From the newly opened menu, choose “Add-ons”.
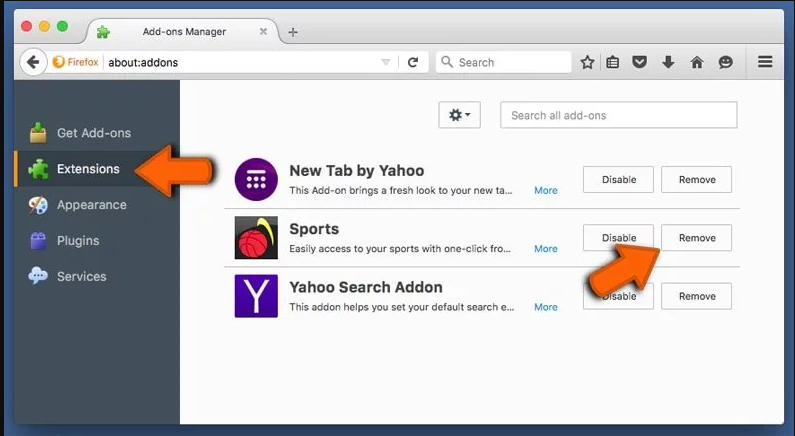
Go to “Extension” option and detect all the latest installed add-ons. Select each of the suspicious add-ons and click on “Remove” button next to them.
In case if you want to “reset” the Mozilla Firefox browser then follow the steps that has been mentioned below.
Reset Mozilla Firefox Settings
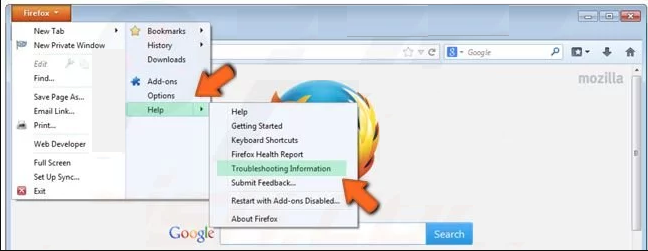
Open the Firefox Mozilla browser and click on “Firefox” button situated at the top left corner of the screen.
In the new menu, go to “Help” sub-menu and choose “Troubleshooting Information”
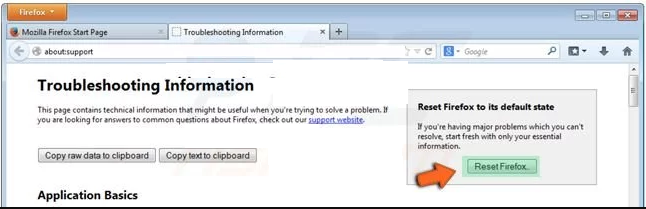
In the “Troubleshooting Information” page, click on “Reset Firefox” button.
Confirm that you want to reset the Mozilla Firefox settings to default by pressing on “Reset Firefox” option
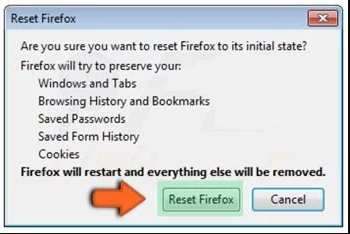
The browser will get restarted and the settings changes to factory default
Delete Unwanted and Malicious Extensions from Google Chrome
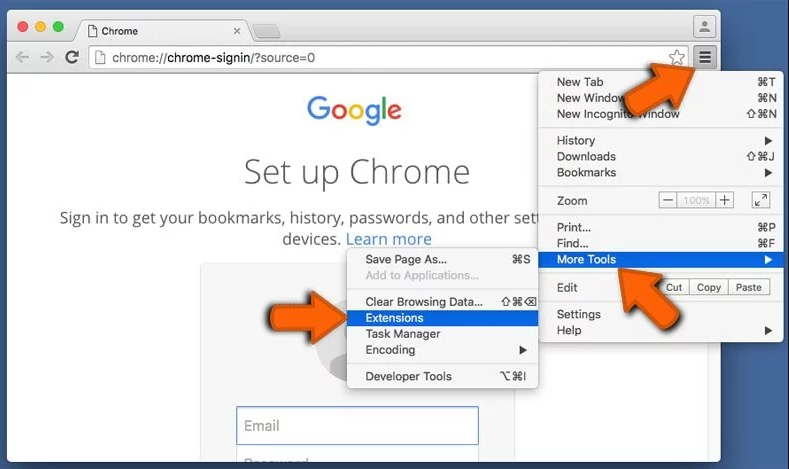
Open the chrome browser and click on “Chrome menu”. From the drop down option, choose “More Tools” and then “Extensions”.
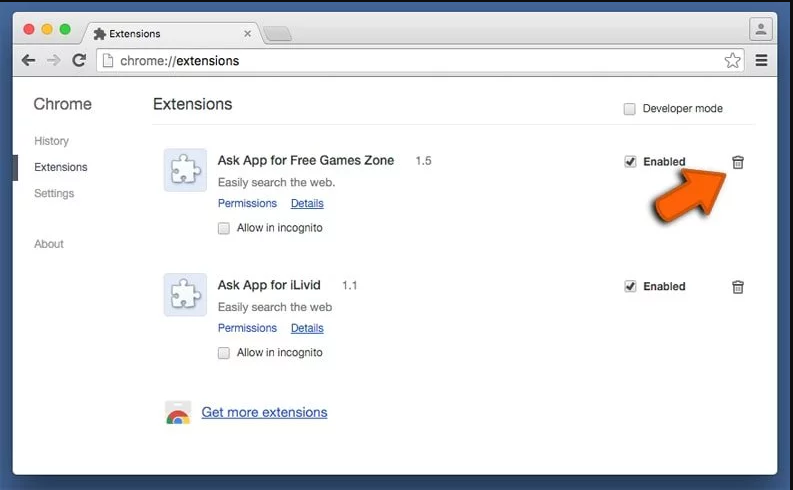
In the “Extensions” option, search for all the recently installed add-ons and extensions. Select them and choose “Trash” button. Any third-party extension is not important for the smooth functionality of the browser.
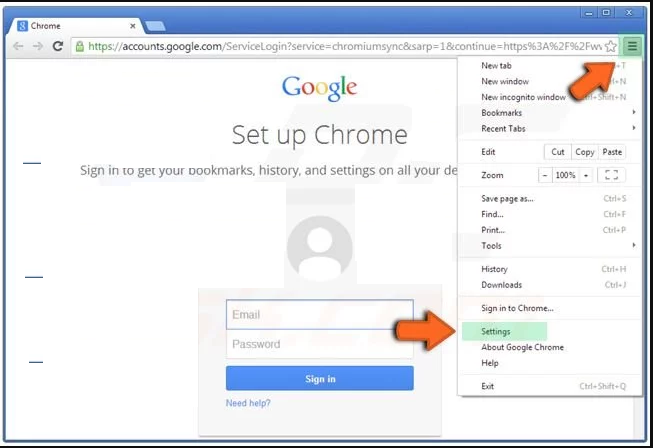
Reset Google Chrome Settings
Open the browser and click on three line bar at the top right side corner of the window.
Go to the bottom of the newly opened window and select “Show advanced settings”.

In the newly opened window, scroll down to the bottom and choose “Reset browser settings”
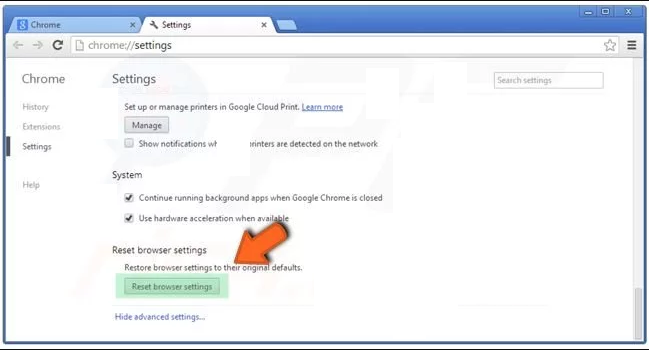
Click on the “Reset” button on the opened “Reset browser settings” window

Restart the browser and the changes you get will be applied
The above mentioned manual process should be executed as it is mentioned. It is a cumbersome process and requires a lot of technical expertise. And hence it is advised for technical experts only. To be sure that your PC is free from malware, it is better that you scan the work-station with a powerful anti-malware tool. The automatic malware removal application is preferred because it doesn’t requires any additional technical skills and expertise.
Special Offer (For Macintosh)
PuAgent can be creepy computer infection that may regain its presence again and again as it keeps its files hidden on computers. To accomplish a hassle free removal of this malware, we suggest you take a try with a powerful antimalware scanner to help you getting rid of this virus
Download the application and execute it on the PC to begin the depth scanning. Once the scanning gets completed, it shows the list of all the files related to PuAgent. You can select such harmful files and folders and remove them immediately.