Easy way to clean install of Windows 10
If you have the knowledge how to perform a clean install of Windows 10, you can prevent your PC from scratch. Also, it will be a worth if your PC is caught with several problems or you want to get rid of any pre-installed bloat or just want to improve the performance of the device.
Clean installation of Windows 10 provides the Windows 10 with its factory settings. For doing this, you require access to your Windows 10 PC because you will have to create the image you’re installing from. Other thing you need is USB flash drive with 8 GB storage and obviously some free time and relax mind.
Before you go, make ensure you have a valid Windows 10 license. You can check for it on your already installed Windows 10 on the “settings” app. Under the ‘Update & Security and in the Activation section from the sidebar, check the message for Windows 10 is activated.
If you are setting up Windows 10 to the device that never had an OS, or you are requiring form it form Windows 8.1 or Windows 7, you will have to purchase a valid license from the Microsoft Store. When you get this, you will be given an activation key that you have to use during the installation process.
You should take your time to backup all important files and data as well. Remember that this process will completely wipe your PC. You can upload your documents, pictures and other important files to OneDrive or other cloud storage service or save it on some external USB hard drive.
Steps to perform a clean install of Windows 10
The process can be divided into phases. In the first phase, you have to download the latest Windows 10 images from Microsoft and create a bootable flash driver for it. The second phase is to use these images to install the Windows 10 on PC.
The complete process will require an exact amount of time. This depends on how your internet speed is – less the speed, more the time will required in uploading the quite large Windows 10 images. SSDs and HDDs are other speed influencer. Faster SSDs will provide quicker installation as compare to older HDDs.
Download Windows 10 Media Creation Tool
This tool will help you in downloading the latest Windows 10 image as well as help you in turning it into the bootable USD drive. You can get this tool from Microsoft Stores. This is not a large download and so you do not have to wait for long. When the downloading is over, just run it as a standalone application, you don’t need to install it.
Create bootable flash drive
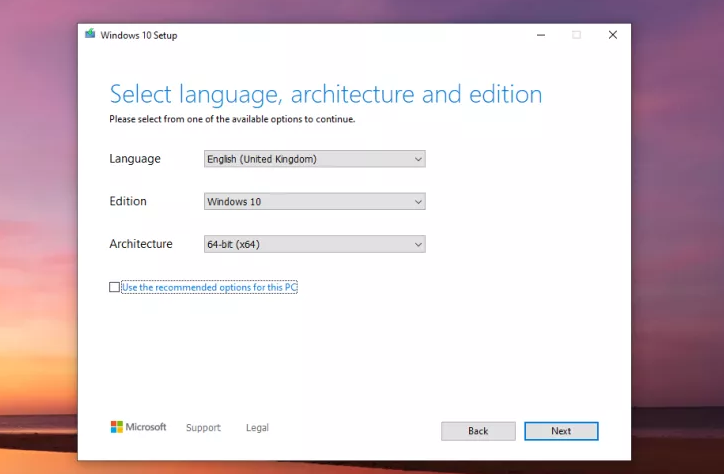
When you get the Media Center Tool on your PC, this process will be an easy step for you. You will see the option “Create installation media for another PC” in it, select it and accept the license terms, choose the language, edition and architecture of Windows 10.
After that, click on Next option, select the USB Flash Drive option and click on the flash drive option form the list. Click Next button and finish the process with clicking Finish button and the tool will start the process of downloading Windows 10 and creating USB installation drive.
Boost the Windows 10 installer
When the Media Creation completed its task, attach the needed things to the PC you want to perform Clean install of Windows 10 on. To run the installer, boot the device using USB drive, instead of HDD or SDD.
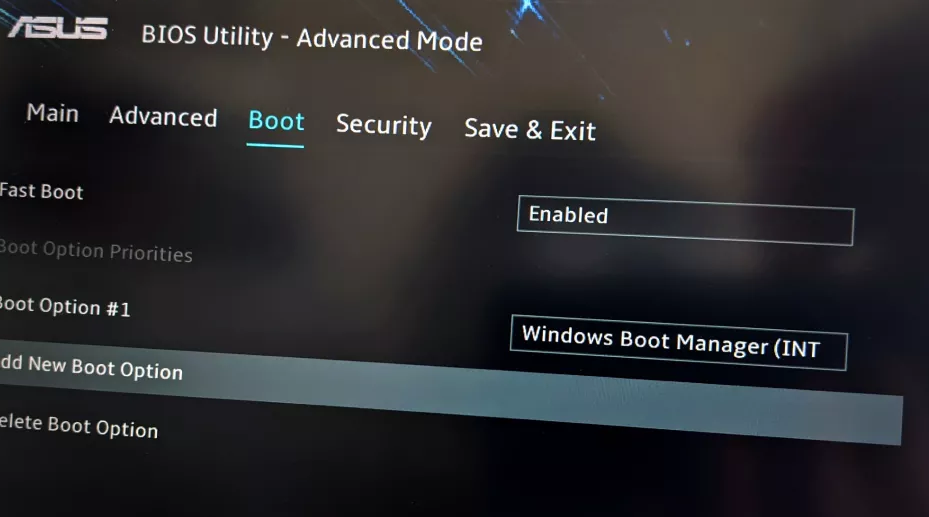
The easy way of doing this is to do this in the BIOS. When you turn on the PC, you will see a keypress to enter the BIOS. It could be referred as Setup or something like F2, F12 or Delete.
In the BIOS, on the Boot tab, and in the list of priority devices, you will see USB drive at the first. This tells the device will boot from the USB drive at first.
(Note: you can revert to the regular boot priority anytime after the Windows 10 installation).
Installation of Windows 10
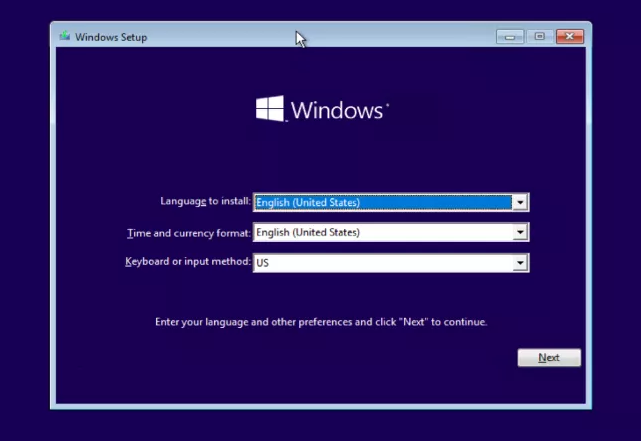
Once the PC has been booted in the Windows 10 installer, the Windows 10 installation process would be straightforward. All that you have to do is to follow the every installation step. Essentially, you have to choose where to install the Windows 10. You will get the option of entering the activation key during the process, if you do have an activation key.
The installation process is time taking. However, this process will not go forever. So, keep patience. When it is complete, the system will reboot. Here, you can either pull out the USB drive from where you were installing or got to the BIOS option and set the PC reboot option to the designation to the Windows 10 drive.
Perform the Windows 10 setup
The last step of clean install of windows 10 is to perform the Windows 10 setup. This process includes going through the Standard Windows 10 setups, adding the network information, Microsoft Account and various preferences.
The last stage is to download the latest updates. Once this is done, the factory- fresh Windows 10 desktop will be in front of you.
Conclusion
Here we end up our guide on how to perform clean install of Windows 10. As you see the entire process is not difficult, however a little time-taking. However, this is an important step to achieve upgraded internal drivers and good fix for slow, bloated systems.